


Screenshots have become a save-it-for-later feature on our iPhones, allowing users to put a pin to a thought, a phone number, or even a receipt. However, have you ever come across the need to take a screenshot of an entire conversation, a recipe, or a webpage? Well, Apple finally made it possible to take a scrolling screenshot on the iPhone running iOS 19, and once you know how to use it, it will become a part of your everyday practice.
Here’s how you can take a scrolling screenshot on your iPhone and when it works best
There are a boatload of utilities of taking a scrolling screenshot on your iPhone, like capturing anything that goes beyond the screen real estate. It is more like screen recording for photos, and it is incredibly handy.
If you are not sure, this is how you can take a scrolling screenshot on your iPhone and when it actually works best.
How to take a scrolling screenshot on your iPhone
Step 1: Take a standard screenshot on your iPhone (press the Side button and the Volume Up button at the same time).
Step 2: Tap on the preview of the screenshot that hovers on the bottom left.
Step 3: Select the Full Page option.
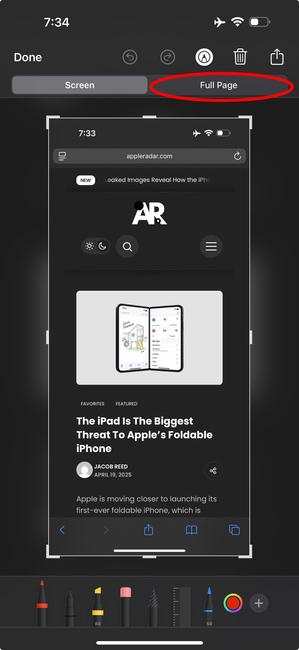
Note: You will only be able to use this option when the content you are about to take a screenshot of is more than one page.
Step 4: You will see a slider on the right showing a snippet of the entire webpage.
Step 5: Once you do that, tap on Done and your scrolling screenshot will be saved.
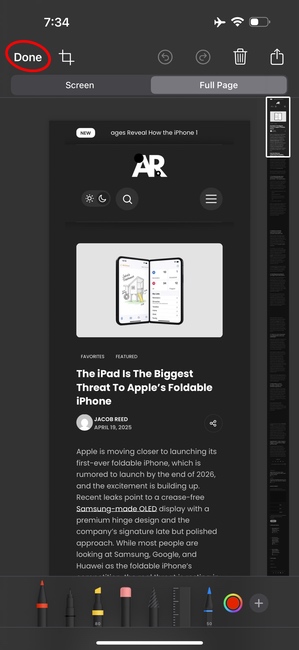
This is all that you have to do to take a scrolling screenshot on your iPhone. Apple also gives you the option to crop the photo before you save it, if you want fewer details in the image. This will allow users to save a specific portion of the Full Page, making it tailored to their needs.
The feature is pretty handy for saving articles for offline reading, capturing a detailed email thread, and much more. It will not only enhance your experience but also your productivity and ensures that you do not miss a single bit of information.
The process is the same on all models of the iPad, so there is no need to be alarmed. If you do not like this method, there are a few third-party apps like Picsew on the App Store that you can use. However, we would stick to Apple’s official method, as it is more clean and allows users to have one less app on their Home Screen.
We will be covering additional guides in the future, so be sure to keep an eye out. You can also check out how to disable Apple Intelligence on your iPhone 16. Let us know your experience in the comments below.
Leave A Reply